30 LinkedIn Tips: #22/30 – Add Media
30 short, useful, actionable LinkedIn tips in 30 days from Doctor David Petherick. #30by30 #TheDoctorisIn
#22/30: Add media. Don't be monochrome and text only.
- Originally written: October 22, 2017
Text & Images Updated: May 19, 2023
You probably are familiar with the phrase 'a picture paints a thousand words'.
So I recommend you add pictures, slides, video, and documents to your profile, especially to your experience sections. Because media helps to tell your story in a way that makes you stand out in a way that text alone simply cannot.
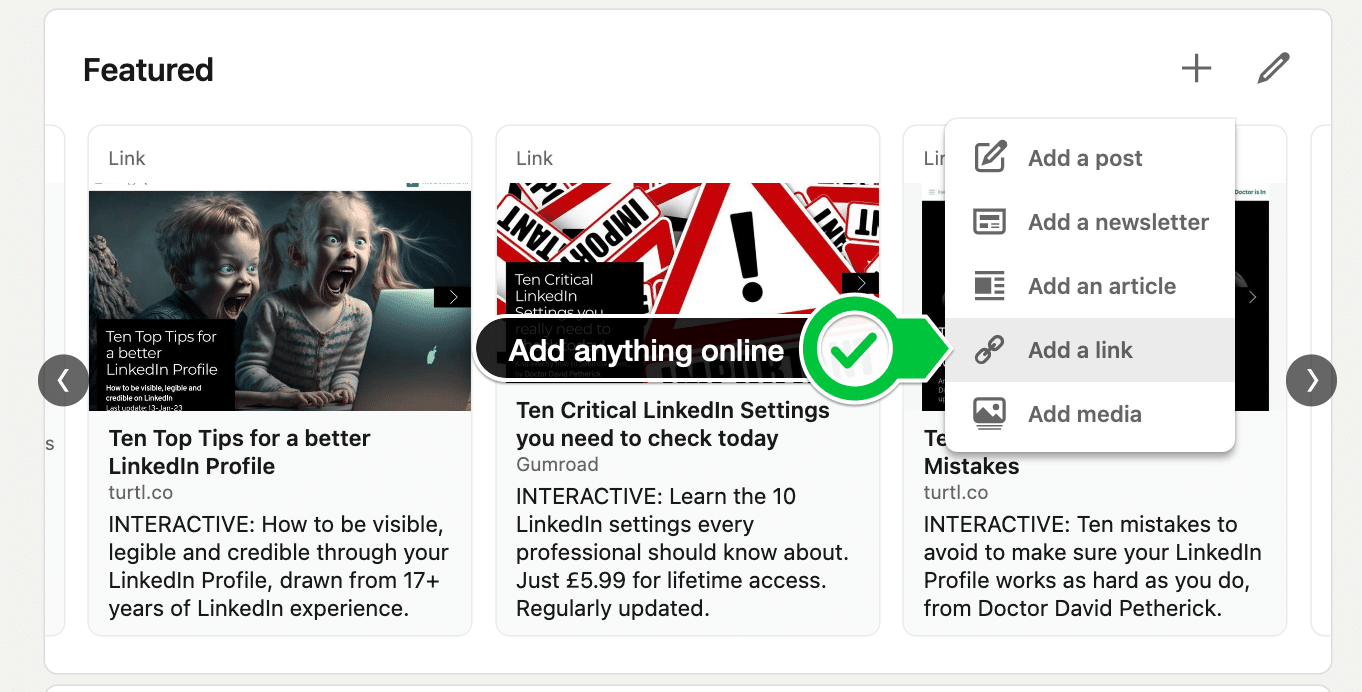
There is also an option called 'Featured' on LinkedIn, which allows you to add media to the top of your profile, and to reorder it.
The media I display helps people to recognise what I do, how I do it, and see how they can get some of it.
Using media in this way allows me to demonstrate and share my knowledge and area of expertise. You should do the same.
1. How to add content to your 'Featured' panel
Simply click on the '+' link, and select what you want to showcase.
You also now will have the option to add new content, or to reorder existing content, or edit the descriptions that appear in the preview.
2. How to add or edit content on the 'Featured' section
Click the little 'edit' pencil to edit, or click the '+' icon to add content.
You will get clear guidance when clicking the '+' icon about how to add posts, articles, links or media.
You'll see that you can only add your own posts, not those from events or group posts.
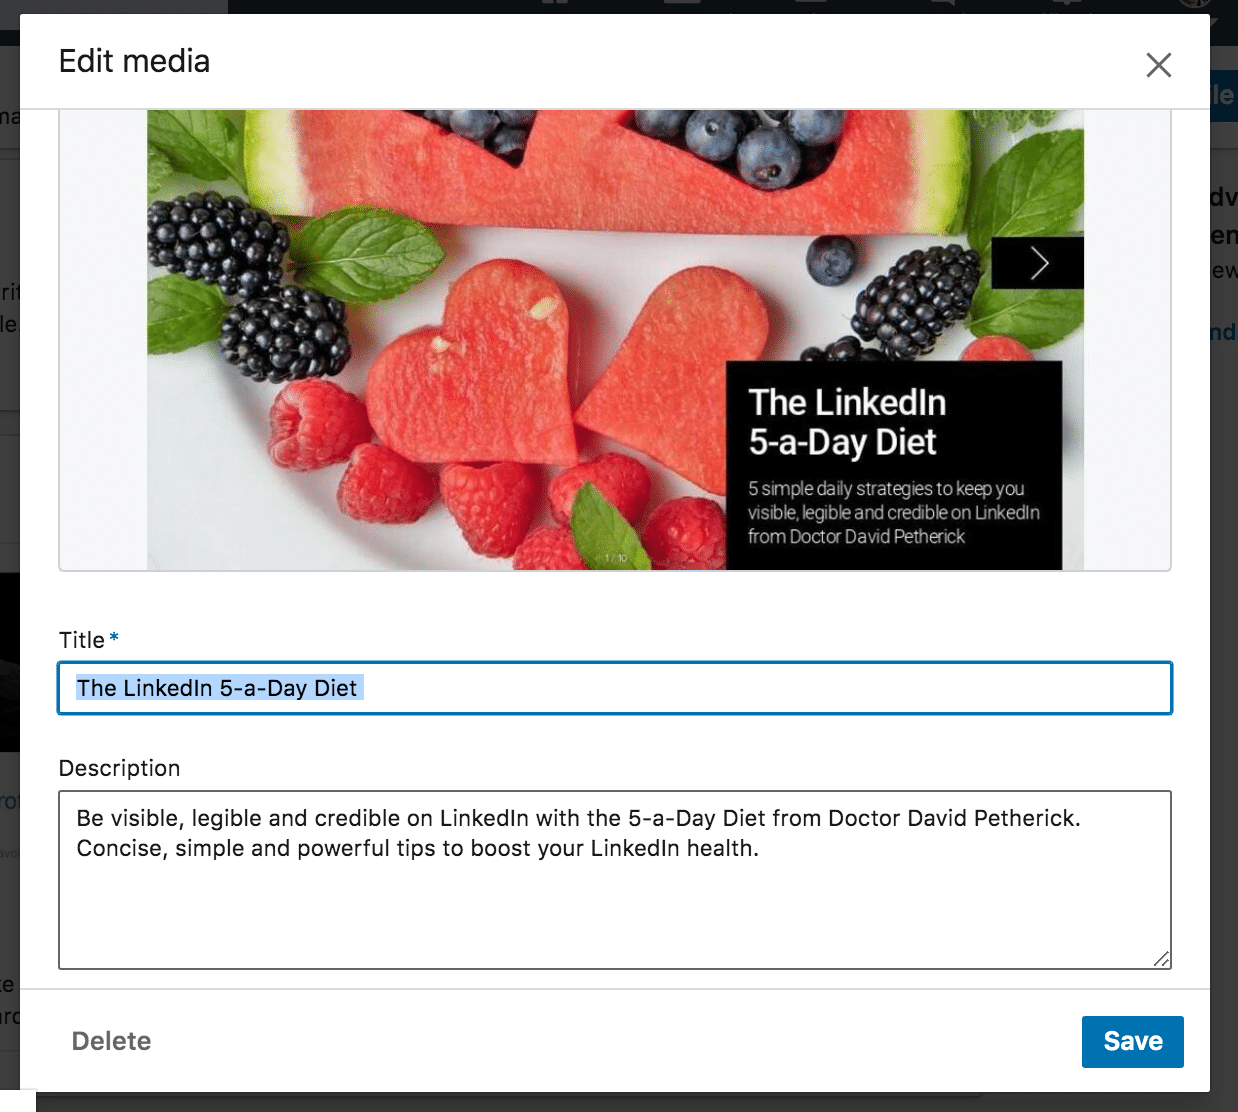
Once you have added some content (and two pieces of media display nicely) you have the option to edit: you can change the order of appearance, and edit the descriptions appearing alongside things like videos, images, and web links.
Sometimes the metadata pulled in from a web link is too verbose, or not properly descriptive of what's to follow, so editing for impact is a good idea.
Rather than saying 'a short video' for example, you could be more precise and say ' View 45s video' and you can edit the title for brevity to make sure it's legible across different devices.
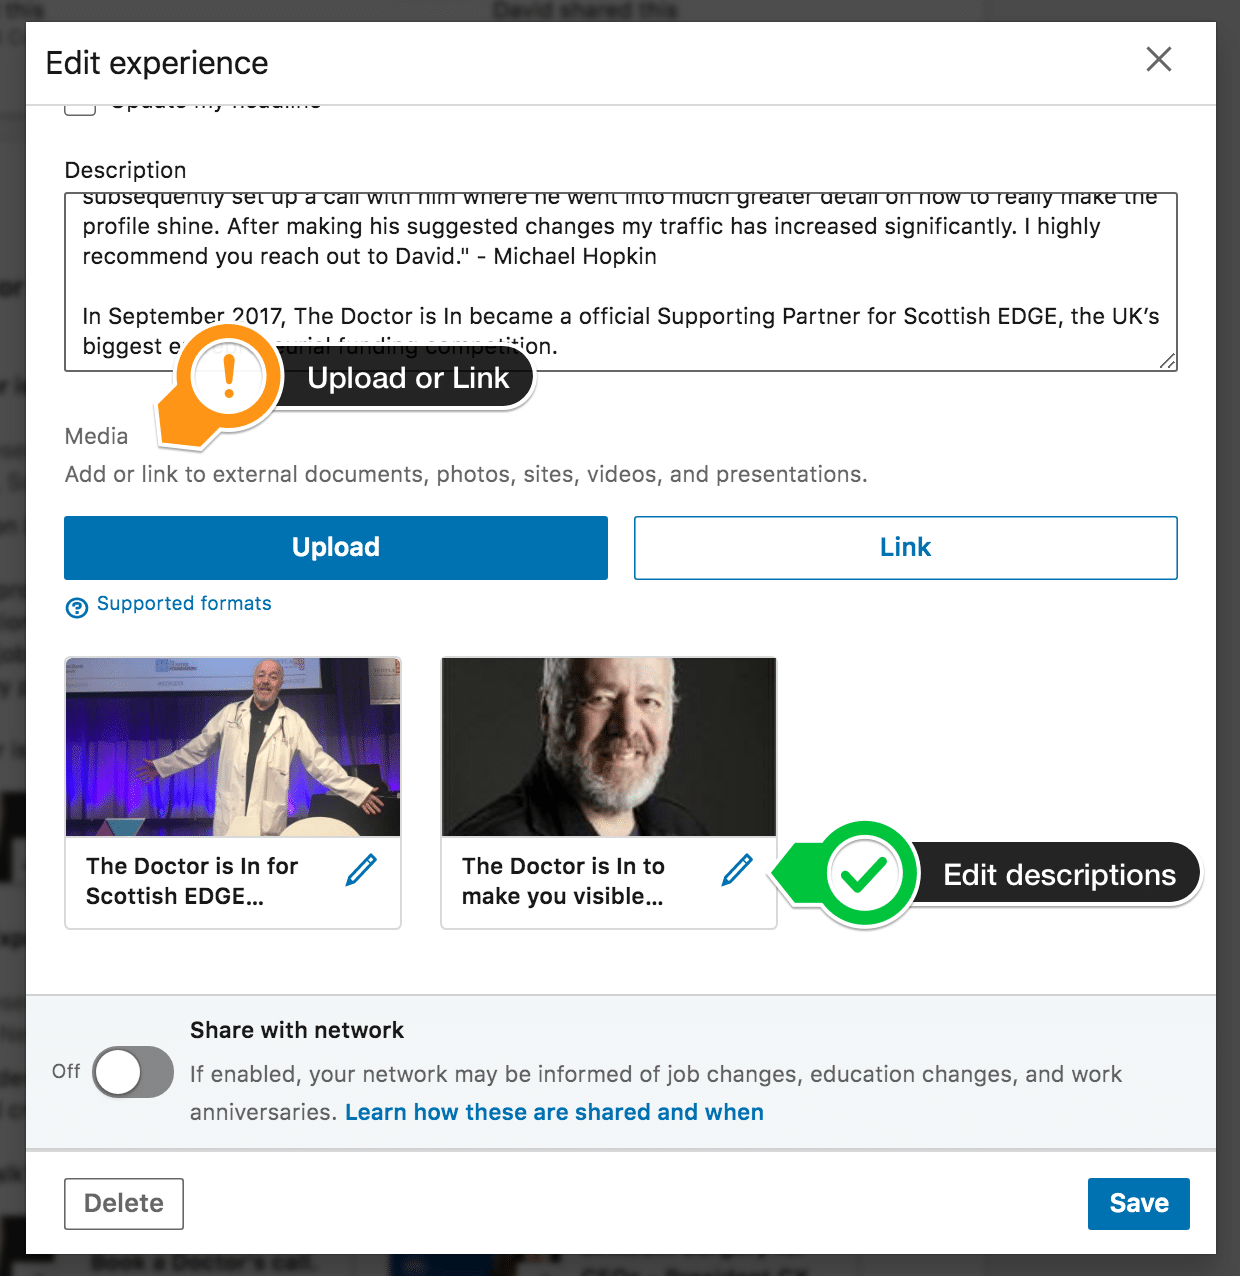
As you can see, it's a question of either adding an online URL to a resource (for example a slideshare presentation) or just uploading a document or photo direct to LinkedIn from your computer.
- Remember: People can browse, and also view certain types of media on your profile without ever having to leave the safe, walled garden of LinkedIn. They will still be looking at your profile.
The next step once you've selected the media or linked to an online resource, is to ensure it has a meaningful title and description.
Make sure you add something useful and interesting here, because it's important in the way the media is viewed by your profile visitors.
A title for media that is just a random filename won't really interest anybody, and you're missing out on telling a relevant story if you leave the description blank.
Once you've done this (you can always go back and re-edit) then it appears on your profile below your summary, or you can also choose to add media below a specific job experience, as illustrated below.
You don't need to restrict what media you add. You can add your CV, photographs, artworks, your presentations, examples of your writing, videos, audio files... it's your chance to literally show people what you can do. Show your swag, strut your stuff and show the world how good you are.
- You can also add relevant media to your current experience section, and even your past experience to showcase your expertise.
You can be very creative and use branding, colour and images for real impact.
The alternative is to have a monochrome, text-filled profile with no visual impact to set you aside from anyone else. Hardly the best option to distinguish yourself.
So use media to liven things up a little to show people your spark, knowledge and energy!
- More Tips: 30 Top Tips for a better LinkedIn Profile – Rounded up and summarised…
- Found these tips useful? Why not thank me by buying me a coffee?


